Migrating
Goal
A safe migration of an existing app to a new app, while still having the old app available. So if something goes wrong, you haven't lost the old app.
Create new app with a different name
In this guide, I'll be using the app vaultwarden as an example. I chose the name testwarden for the new app install.
I installed the new app with mostly default settings, just changed service type to ClusterIP and setup a new, temporary, ingress.
Scale down both apps
We need to run the following commands in the host shell. Everything between <> needs to be replaced with the actual value.
First, we need to get the names of the deploys.
k3s kubectl get deploy -n ix-<old-app>
k3s kubectl get deploy -n ix-<new-app>
Example:
root@truenasvm[/mnt/tank/apps]# k3s kubectl get deploy -n ix-vaultwarden
NAME          READY   UP-TO-DATE   AVAILABLE   AGE
vaultwarden   1/1     1            1           3h21m
root@truenasvm[/mnt/tank/apps]# k3s kubectl get deploy -n ix-testwarden
NAME                                  READY   UP-TO-DATE   AVAILABLE   AGE
testwarden-vaultwarden-cnpg-main-rw   2/2     2            2           3h12m
testwarden-vaultwarden                1/1     1            1           3h12m
Here we find the names of the deploys we want to scale down. For apps installed with the default name, it will just be that name.
For apps installed with a different name, it will be <app-name>-<default-name>.
So for vaultwarden (the default name), it will be vaultwarden. But for the vaultwarden app that was installed with the name testwarden, it will be testwarden-vaultwarden.
k3s kubectl scale deploy <app-name>-<default-name> -n ix-<app-name> --replicas=0
k3s kubectl scale deploy <app-name> -n ix-<app-name> --replicas=0
k3s kubectl scale deploy testwarden-vaultwarden -n ix-testwarden --replicas=0
k3s kubectl scale deploy vaultwarden -n ix-vaultwarden --replicas=0
Postgresql databases
You can skip this section if the app in question doesn't have a Postgresql database
If the app uses a Postgresql database, we need to make a backup and restore that backup to the new app's database.
Make sure you have pgAdmin installed, as we'll be using it to make a backup and to restore the database. It's a TrueCharts app from the stable train. You can install it with all default settings, and it will work.
Also make sure you have the database info script (tcdbinfo.sh) available on your server.
See example images for this section

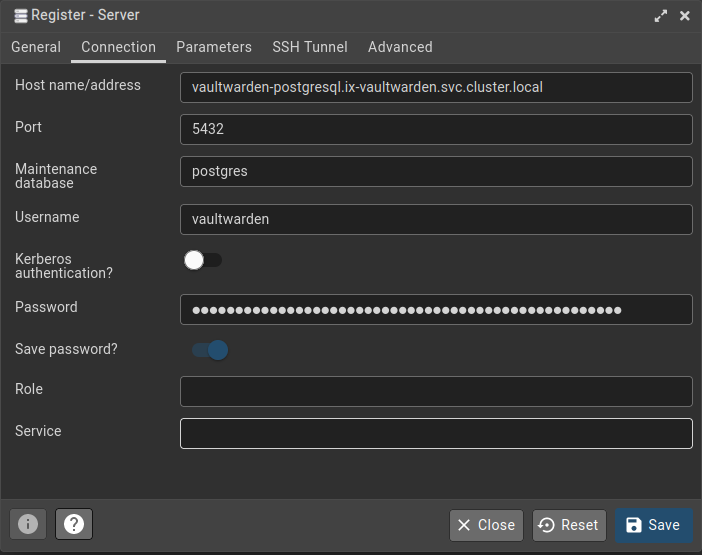

Configure database connections in pgAdmin
run the tcdbinfo.sh script to see the connection details for both the old and the new database, and set them up in pgAdmin.
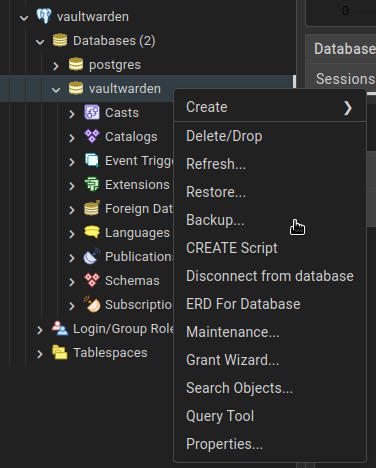
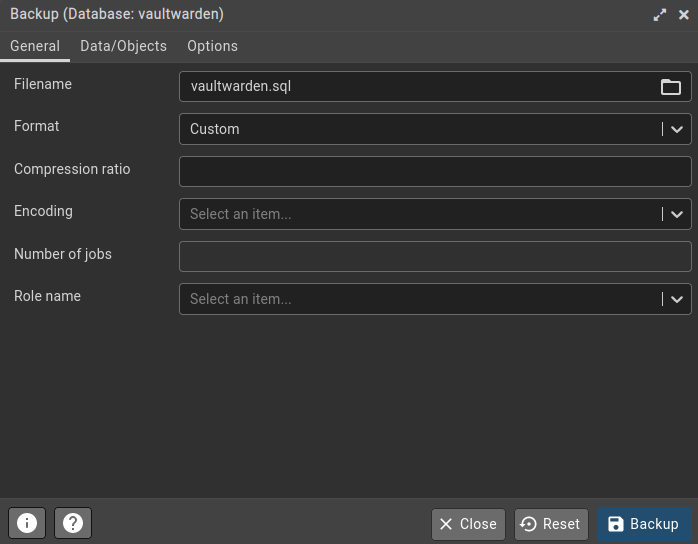
Create database Backup
In pgAdmin, right click vaultwarden->Databases->vaultwarden and click Backup.... Give the file a name (e.g. vaultwarden.sql) and click Backup.
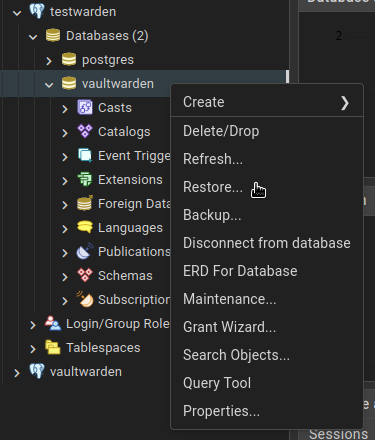
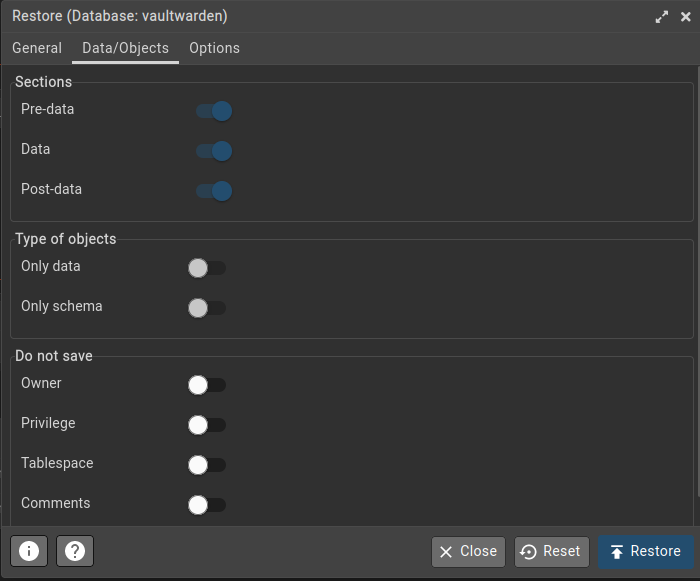
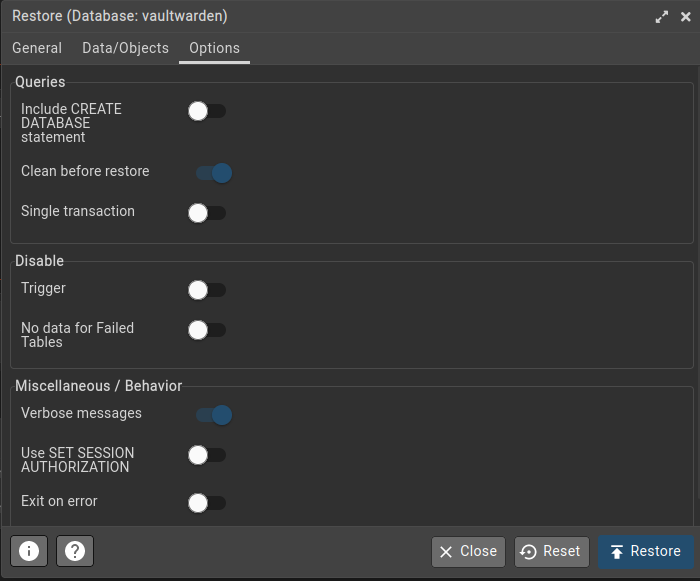
Restore database backup
In pgAdmin, right click testwarden->Databases->vaultwarden and click Restore.... Select the sql file (vaultwarden.sql).
On the 2nd tab page, select the first 3 options (Pre-data, Data and Post-data). On the last tab, select Clean before restore. Now click Restore.
Migrate the PVCs
Get the PVCs names and paths
The following commands will return the PVCs for the old and the new install.
k3s kubectl get pvc -n ix-vaultwarden
k3s kubectl get pvc -n ix-testwarden
Take note of all the PVCs that do not contain postgres, redis or cnpg. vaultwarden only has 1 data PVC. There are apps that have more than 1. You'll want to migrate them all.
Now, find the full paths to all these PVCs.
zfs list | grep pvc | grep legacy
If this returns a very long list, you can add | grep <app-name> to filter for only the PVCs of the app you're currently working on.
A full PVC path looks something like this: poolname/ix-applications/releases/app-name/volumes/pvc-32341f93-0647-4bf9-aab1-e09b3ebbd2b3.
Destroy new PVC and copy over old PVC
Destroy the PVCs of the new app and replicate the PVC of the old app to the new location.
Make sure you're not mixing up the old app and the new app here. Destroy the NEW PVC. The old PVC contains your data.
zfs destroy new-pvc
zfs snapshot old-pvc@migrate
zfs send old-pvc@migrate | zfs recv new-pvc@migrate
zfs set mountpoint=legacy new-pvc
The new-pvc will look something like poolname/ix-applications/releases/testwarden/volumes/pvc-32341f93-0647-4bf9-aab1-e09b3ebbd2b3.
The old-pvc will look something like poolname/ix-applications/releases/vaultwarden/volumes/pvc-40275e0e-5f99-4052-96f1-63e26be01236.
Example of all commands in one go:
root@truenasvm[~]# k3s kubectl get pvc -n ix-vaultwarden
NAME                          STATUS   VOLUME                                     CAPACITY   ACCESS MODES   STORAGECLASS                   AGE
vaultwarden-data              Bound    pvc-33646e70-ccaa-464c-b315-64b24fcd9e83   256Gi      RWO            ix-storage-class-vaultwarden   4h27m
db-vaultwarden-postgresql-0   Bound    pvc-5b3aa878-0b76-4022-8542-b82cd3fdcf71   999Gi      RWO            ix-storage-class-vaultwarden   4h27m
root@truenasvm[~]# k3s kubectl get pvc -n ix-testwarden
NAME                                     STATUS   VOLUME                                     CAPACITY   ACCESS MODES   STORAGECLASS                  AGE
testwarden-vaultwarden-data              Bound    pvc-e56982a7-e2c7-4b98-b875-5612d92506fd   256Gi      RWO            ix-storage-class-testwarden   4h18m
testwarden-vaultwarden-cnpg-main-1       Bound    pvc-bed595ad-74f1-4828-84c7-764693785630   256Gi      RWO            ix-storage-class-testwarden   4h18m
testwarden-vaultwarden-cnpg-main-1-wal   Bound    pvc-79d46775-f60b-4dc6-99a3-1a63d26cd171   256Gi      RWO            ix-storage-class-testwarden   4h18m
testwarden-vaultwarden-cnpg-main-2       Bound    pvc-dbc6501a-bfac-4a95-81a2-c05c5b28b5ff   256Gi      RWO            ix-storage-class-testwarden   4h18m
testwarden-vaultwarden-cnpg-main-2-wal   Bound    pvc-331f5cf3-5f39-4567-83f7-3700d4f582db   256Gi      RWO            ix-storage-class-testwarden   4h18m
root@truenasvm[~]# zfs list | grep pvc | grep legacy | grep warden
tank/ix-applications/releases/testwarden/volumes/pvc-331f5cf3-5f39-4567-83f7-3700d4f582db    1.10M  25.1G     1.10M  legacy
tank/ix-applications/releases/testwarden/volumes/pvc-79d46775-f60b-4dc6-99a3-1a63d26cd171    4.72M  25.1G     4.72M  legacy
tank/ix-applications/releases/testwarden/volumes/pvc-bed595ad-74f1-4828-84c7-764693785630    8.67M  25.1G     8.67M  legacy
tank/ix-applications/releases/testwarden/volumes/pvc-dbc6501a-bfac-4a95-81a2-c05c5b28b5ff    8.64M  25.1G     8.64M  legacy
tank/ix-applications/releases/testwarden/volumes/pvc-e56982a7-e2c7-4b98-b875-5612d92506fd     112K  25.1G      112K  legacy
tank/ix-applications/releases/vaultwarden/volumes/pvc-33646e70-ccaa-464c-b315-64b24fcd9e83    112K  25.1G      112K  legacy
tank/ix-applications/releases/vaultwarden/volumes/pvc-5b3aa878-0b76-4022-8542-b82cd3fdcf71   12.8M  25.1G     12.8M  legacy
root@truenasvm[~]# zfs destroy tank/ix-applications/releases/testwarden/volumes/pvc-e56982a7-e2c7-4b98-b875-5612d92506fd
root@truenasvm[~]# zfs snapshot tank/ix-applications/releases/vaultwarden/volumes/pvc-33646e70-ccaa-464c-b315-64b24fcd9e83@migrate
root@truenasvm[~]# zfs send tank/ix-applications/releases/vaultwarden/volumes/pvc-33646e70-ccaa-464c-b315-64b24fcd9e83@migrate | zfs recv tank/ix-applications/releases/testwarden/volumes/pvc-e56982a7-e2c7-4b98-b875-5612d92506fd@migrate
root@truenasvm[~]# zfs set mountpoint=legacy tank/ix-applications/releases/testwarden/volumes/pvc-e56982a7-e2c7-4b98-b875-5612d92506fd
Scale up both apps
Use the same commands from the scaling down step, but replace the 0 with a 1.
k3s kubectl scale deploy testwarden-vaultwarden -n ix-testwarden --replicas=1
k3s kubectl scale deploy vaultwarden -n ix-vaultwarden --replicas=1
Conclusion
You should now be able to log in on the new install.